Time needed: 4 minutes
Follow from Step 1 to Step 4 in order to create Contiki OS projects. Quick guide to create Port Contiki. Reach us , if you want an customize Contiki OS projects works for scholars.
We can port Contiki-NG to a new hardware device, IoT-type device with the following characteristics: like, microcontroller and on-chip peripherals and also Various off-chip peripherals. For the example the devices are Arm Cortex, msp430- or avr-based, UART, SPI, I2C, DMA,LEDs, buttons, sensors. . And also perform the process based on a standard IEEE 802.15.4 radio operating at the 2.4GHz band, a sub-ghz radio, or a BLE radio.
For perform the process , we need to add cpu supported source codes into our IoT related Devices. For perform the cpu support creation process , follow the given process.
Intially we need to Create a directory under arch/cpu/ location and name it my-new-mcu. Under arch/cpu/my-new-mcu, create the following files:
Makefile.my-new-mcu: in this step , we will provide the guide to how to build firmware images suitable for your MCU.
my-new-mcu-conf.h: in this step , we will put MCU-specific macros that users are expected to be able to modify
my-new-mcu-def.h: in this step , we will put MCU-specific macros that users should not modify. One such example is the typedef for clock_time_t and the number of software clock ticks per second CLOCK_CONF_SECOND
For make a Configuration process , we need to perform the process on Makefile.my-new-mcu to specify our CPU-dependent source files. These are specified by appending to the CONTIKI_SOURCEFILES make variable, by using the following code, in the contiki-conf.h
CPU-dependent source files
CONTIKI_CPU_SOURCEFILES += soc.c clock.c rtimer-arch.c uart.c watchdog.c
DEBUG_IO_SOURCEFILES += dbg-printf.c dbg-snprintf.c dbg-sprintf.c strformat.c
USB_SOURCEFILES += usb-core.c cdc-acm.c usb-arch.c usb-serial.c cdc-acm-descriptors.c
This is what will actually instruct the system to build all of the above
CONTIKI_SOURCEFILES += $(CONTIKI_CPU_SOURCEFILES) $(DEBUG_IO_SOURCEFILES)
CONTIKI_SOURCEFILES += $(USB_SOURCEFILES)
For develop the MCU driver, we need to implement drivers to the Contiki-NG timer infrastructure. Based on the following steps,
• Initially , we need to create a clock.c file and also develop the functions required by the clock API. And also create an interrupt handler that will update the software clock counter each time based on the reference os/sys/clock.h for the function prototypes.
• The arch-specific implementation of rtimers: This is likely to be in files named rtimer-arch.[ch]. For more information refer the file os/sys/rtimer.h.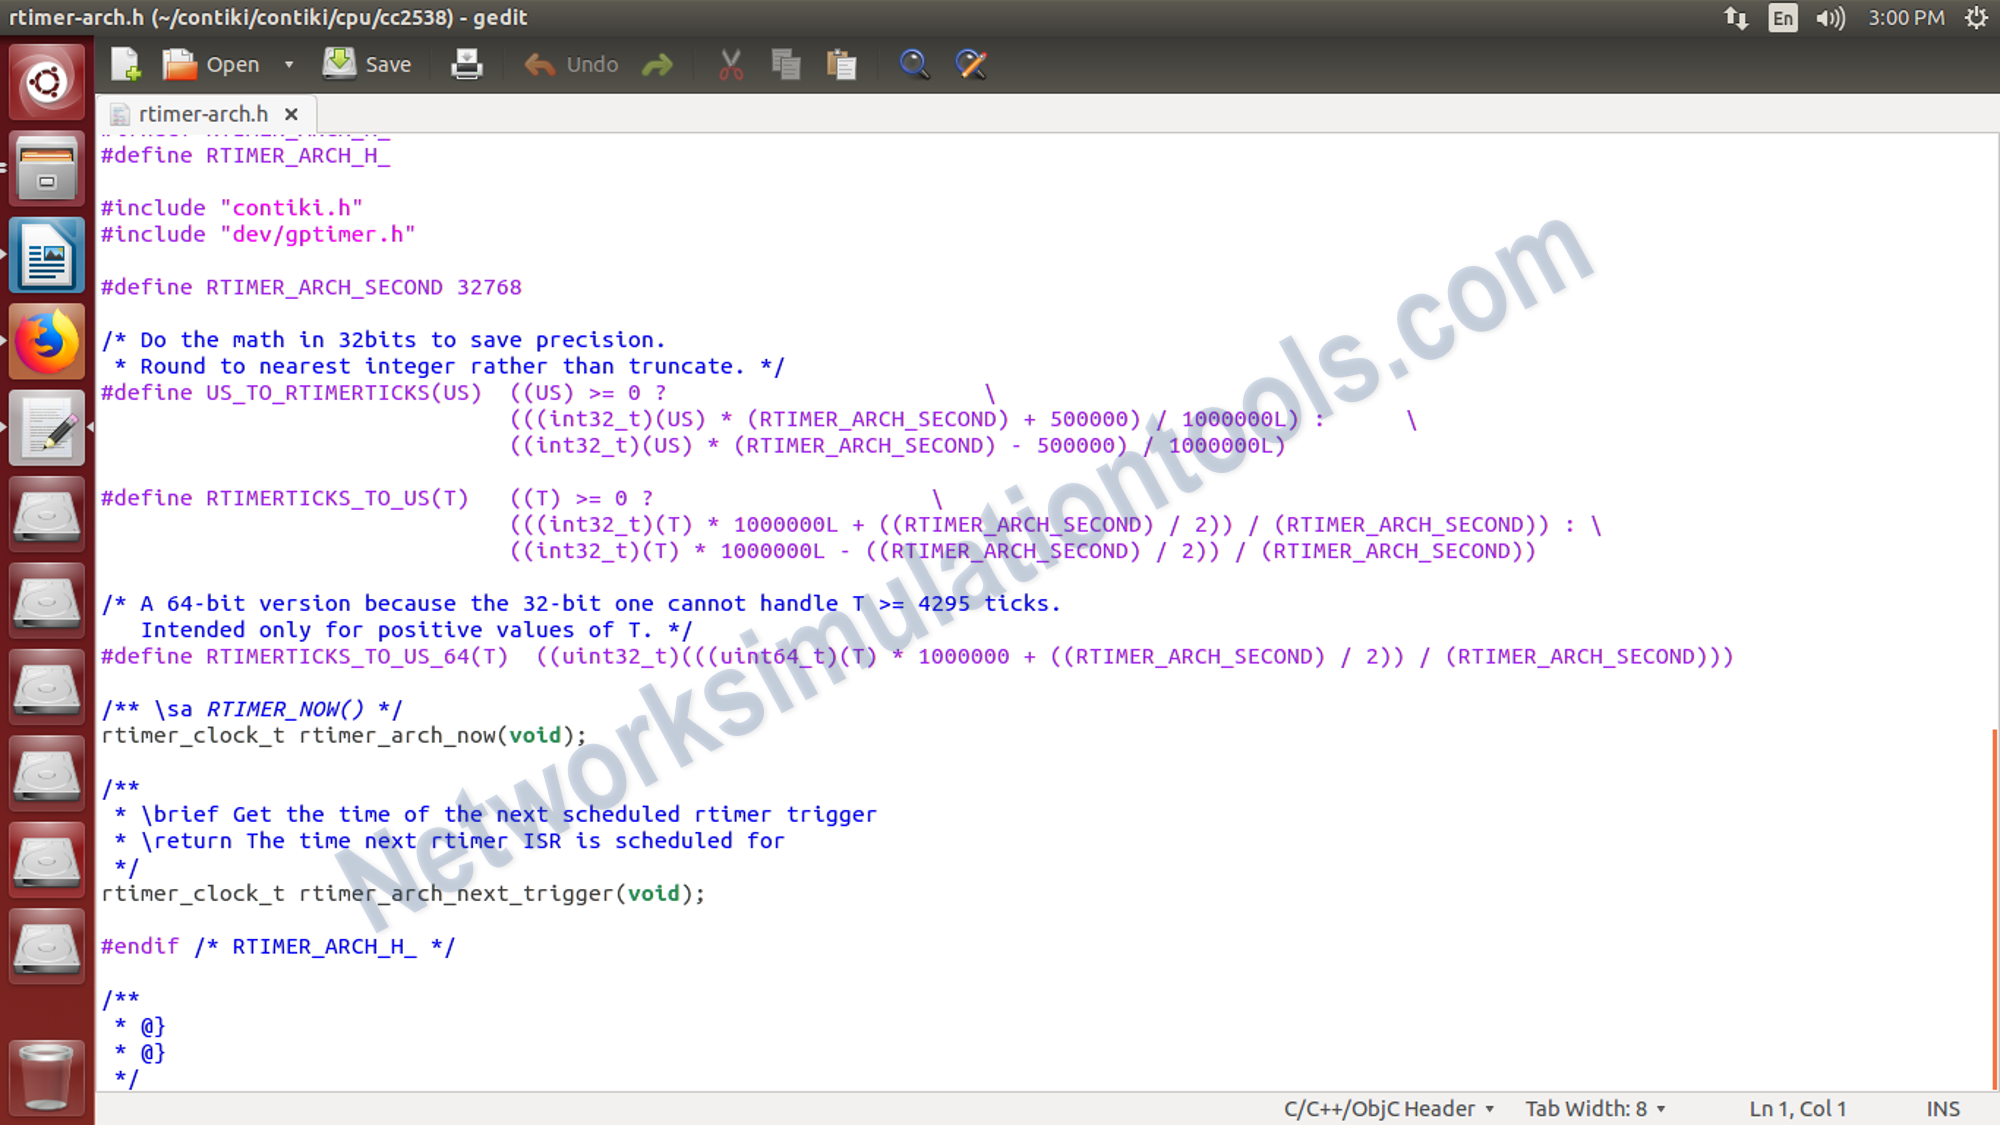
If you face any issues on How to Port Contiki, reach us to create an customize Contiki simulation projects.
| Technology | Ph.D | MS | M.Tech |
|---|---|---|---|
| NS2 | 75 | 117 | 95 |
| NS3 | 98 | 119 | 206 |
| OMNET++ | 103 | 95 | 87 |
| OPNET | 36 | 64 | 89 |
| QULANET | 30 | 76 | 60 |
| MININET | 71 | 62 | 74 |
| MATLAB | 96 | 185 | 180 |
| LTESIM | 38 | 32 | 16 |
| COOJA SIMULATOR | 35 | 67 | 28 |
| CONTIKI OS | 42 | 36 | 29 |
| GNS3 | 35 | 89 | 14 |
| NETSIM | 35 | 11 | 21 |
| EVE-NG | 4 | 8 | 9 |
| TRANS | 9 | 5 | 4 |
| PEERSIM | 8 | 8 | 12 |
| GLOMOSIM | 6 | 10 | 6 |
| RTOOL | 13 | 15 | 8 |
| KATHARA SHADOW | 9 | 8 | 9 |
| VNX and VNUML | 8 | 7 | 8 |
| WISTAR | 9 | 9 | 8 |
| CNET | 6 | 8 | 4 |
| ESCAPE | 8 | 7 | 9 |
| NETMIRAGE | 7 | 11 | 7 |
| BOSON NETSIM | 6 | 8 | 9 |
| VIRL | 9 | 9 | 8 |
| CISCO PACKET TRACER | 7 | 7 | 10 |
| SWAN | 9 | 19 | 5 |
| JAVASIM | 40 | 68 | 69 |
| SSFNET | 7 | 9 | 8 |
| TOSSIM | 5 | 7 | 4 |
| PSIM | 7 | 8 | 6 |
| PETRI NET | 4 | 6 | 4 |
| ONESIM | 5 | 10 | 5 |
| OPTISYSTEM | 32 | 64 | 24 |
| DIVERT | 4 | 9 | 8 |
| TINY OS | 19 | 27 | 17 |
| TRANS | 7 | 8 | 6 |
| OPENPANA | 8 | 9 | 9 |
| SECURE CRT | 7 | 8 | 7 |
| EXTENDSIM | 6 | 7 | 5 |
| CONSELF | 7 | 19 | 6 |
| ARENA | 5 | 12 | 9 |
| VENSIM | 8 | 10 | 7 |
| MARIONNET | 5 | 7 | 9 |
| NETKIT | 6 | 8 | 7 |
| GEOIP | 9 | 17 | 8 |
| REAL | 7 | 5 | 5 |
| NEST | 5 | 10 | 9 |
| PTOLEMY | 7 | 8 | 4 |